
2025年8月1日
•5分鐘閱讀
成為工程師後,我發現這份工作更像是在寫文章,特別是在 AI 崛起之後,花更多時間理解需求,並將抽象概念轉化為 PRD 及實際產品。
初期需求討論:
Debug / Ticket 回報:
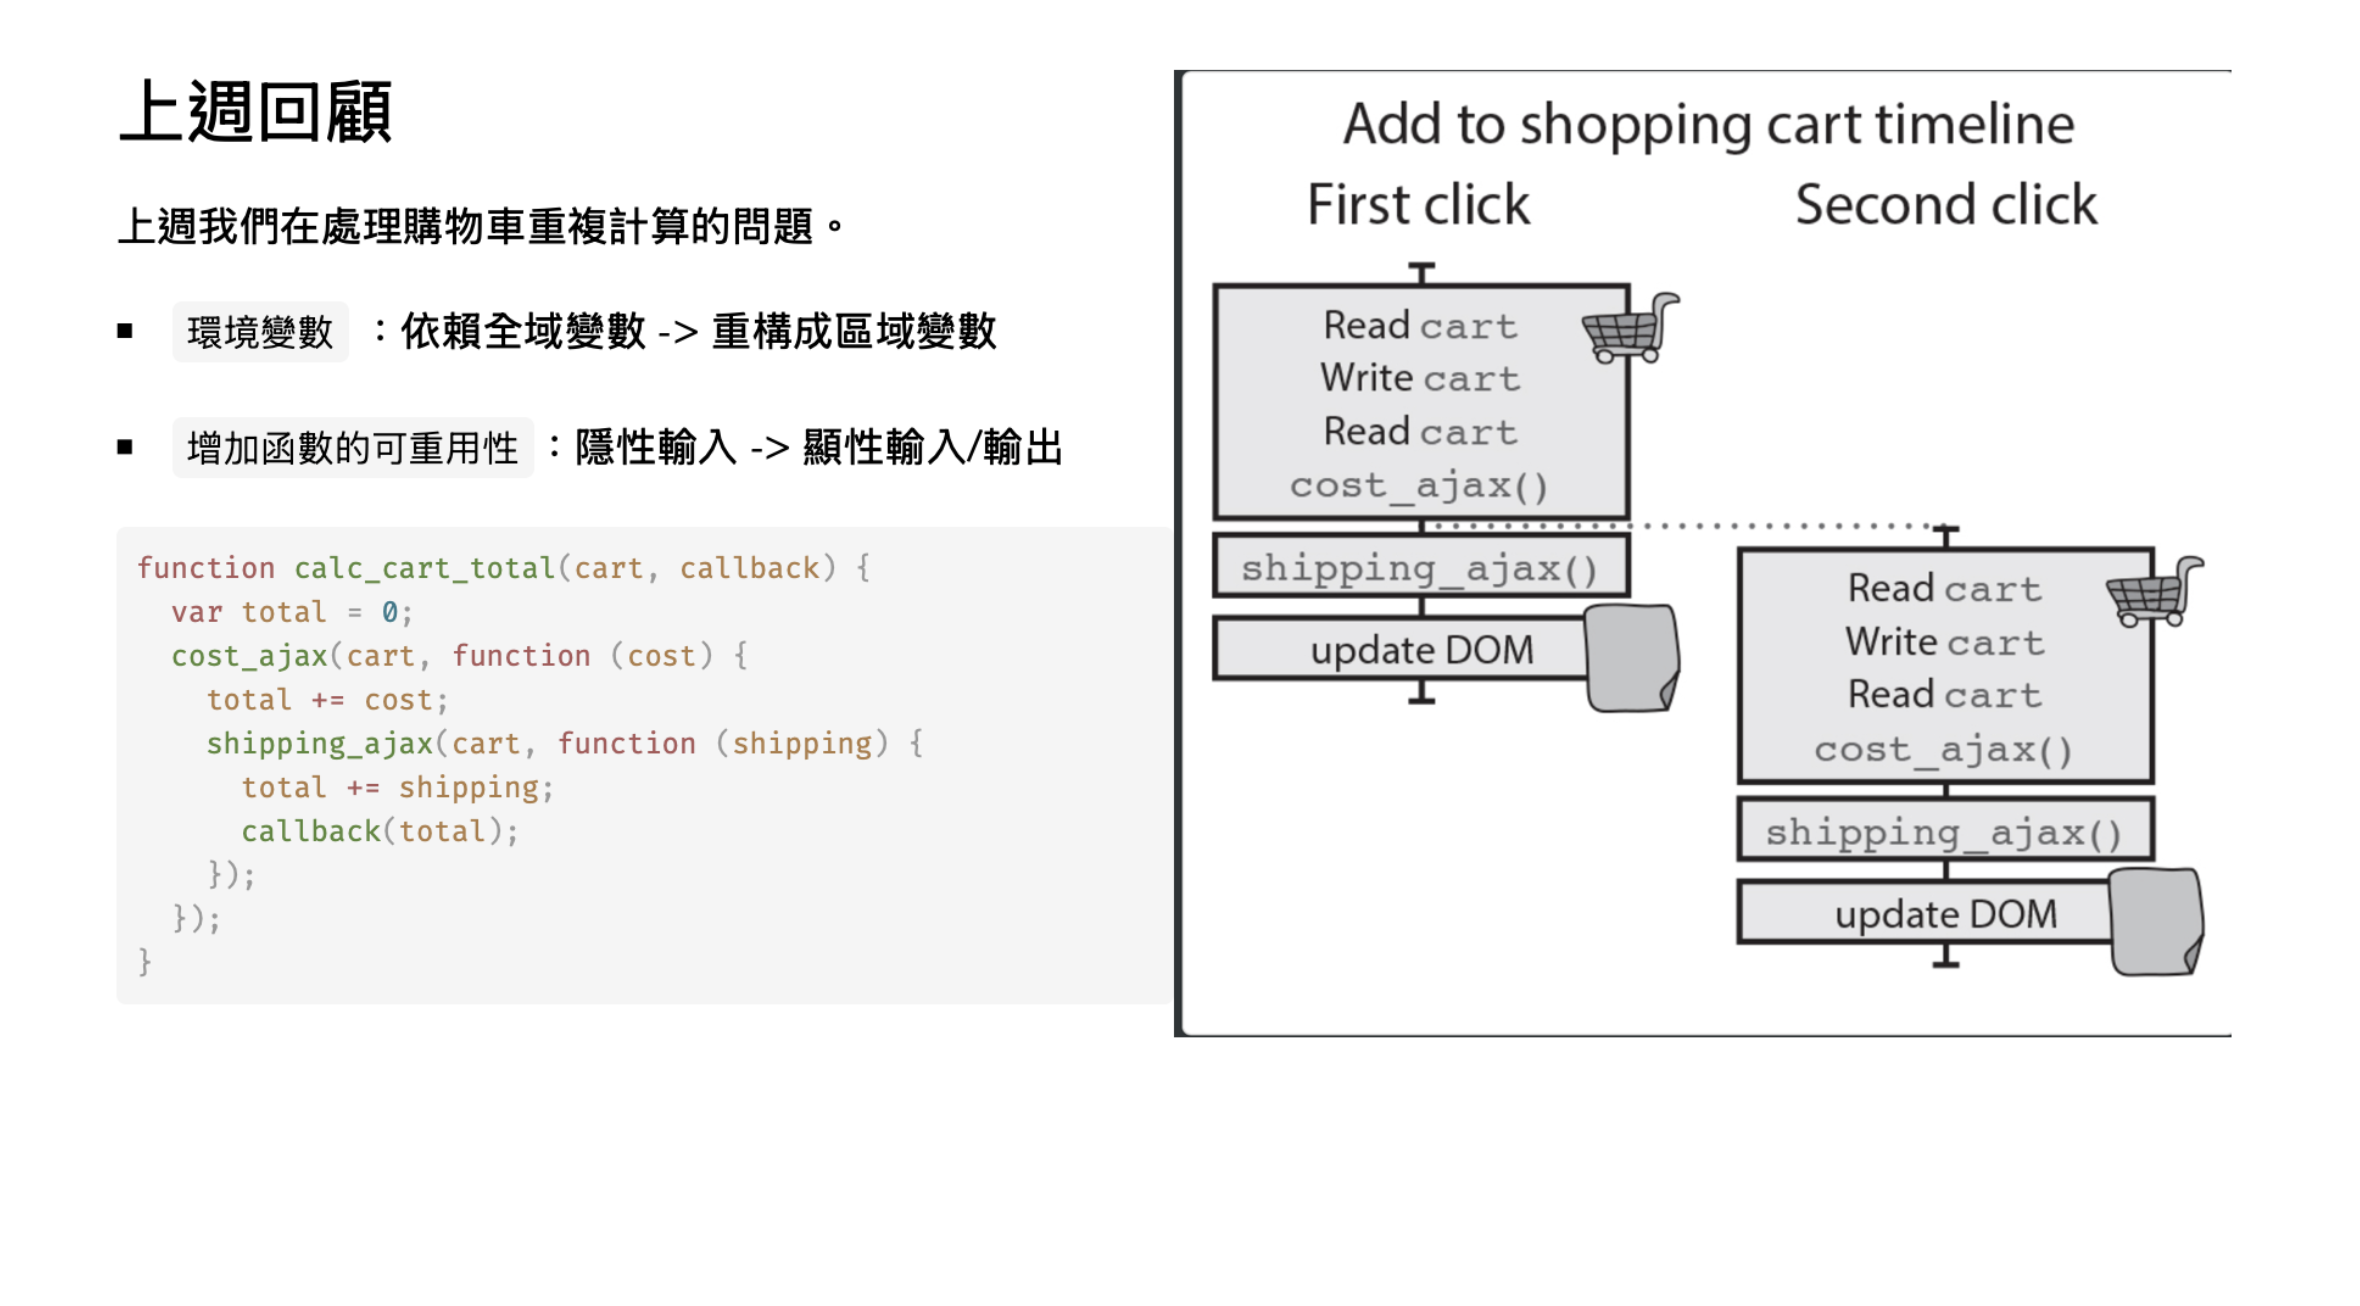
因此日常如何整理筆記也成為了一個硬需求,最近終於有時間重構自己的部落格,並搬遷 Docusaurus 上的舊文,同時符合日常的筆記習慣。
內容管理系統常出現在各種專案中,根據角色、資源與客戶需求動態調整策略,這些是最近歸納出來的經驗:
從大學起就習慣用 Obsidian、HackMD 做筆記,因此嘗試用 Docusaurus 管理開放文件。
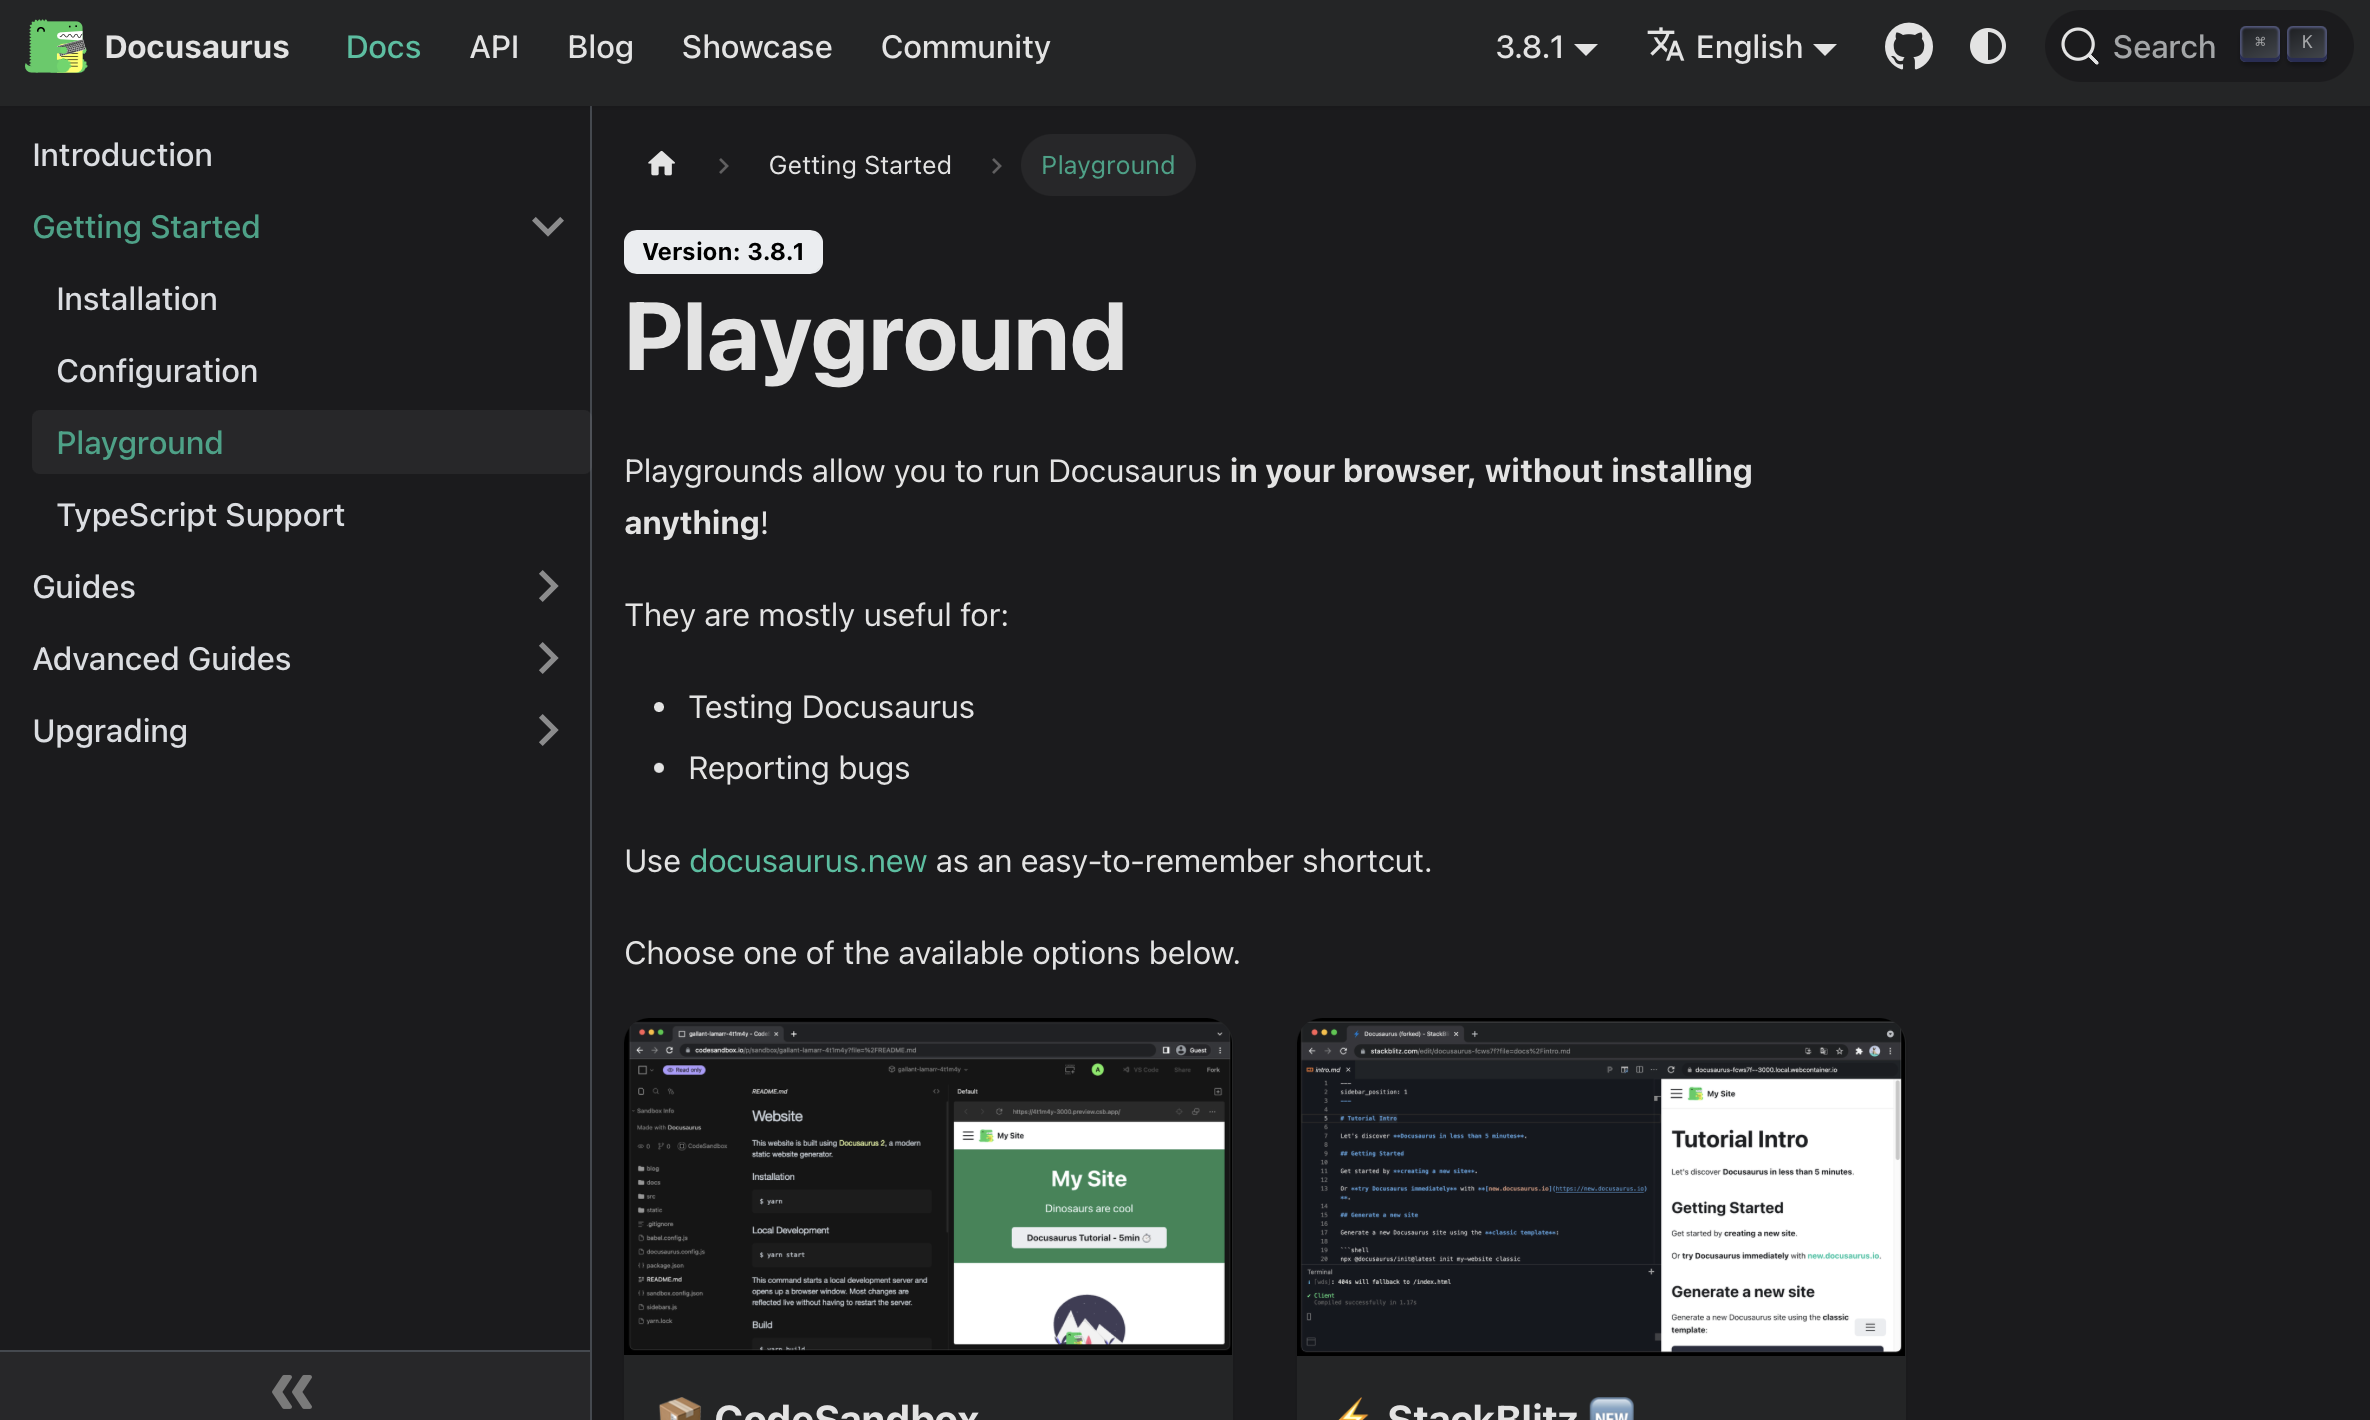
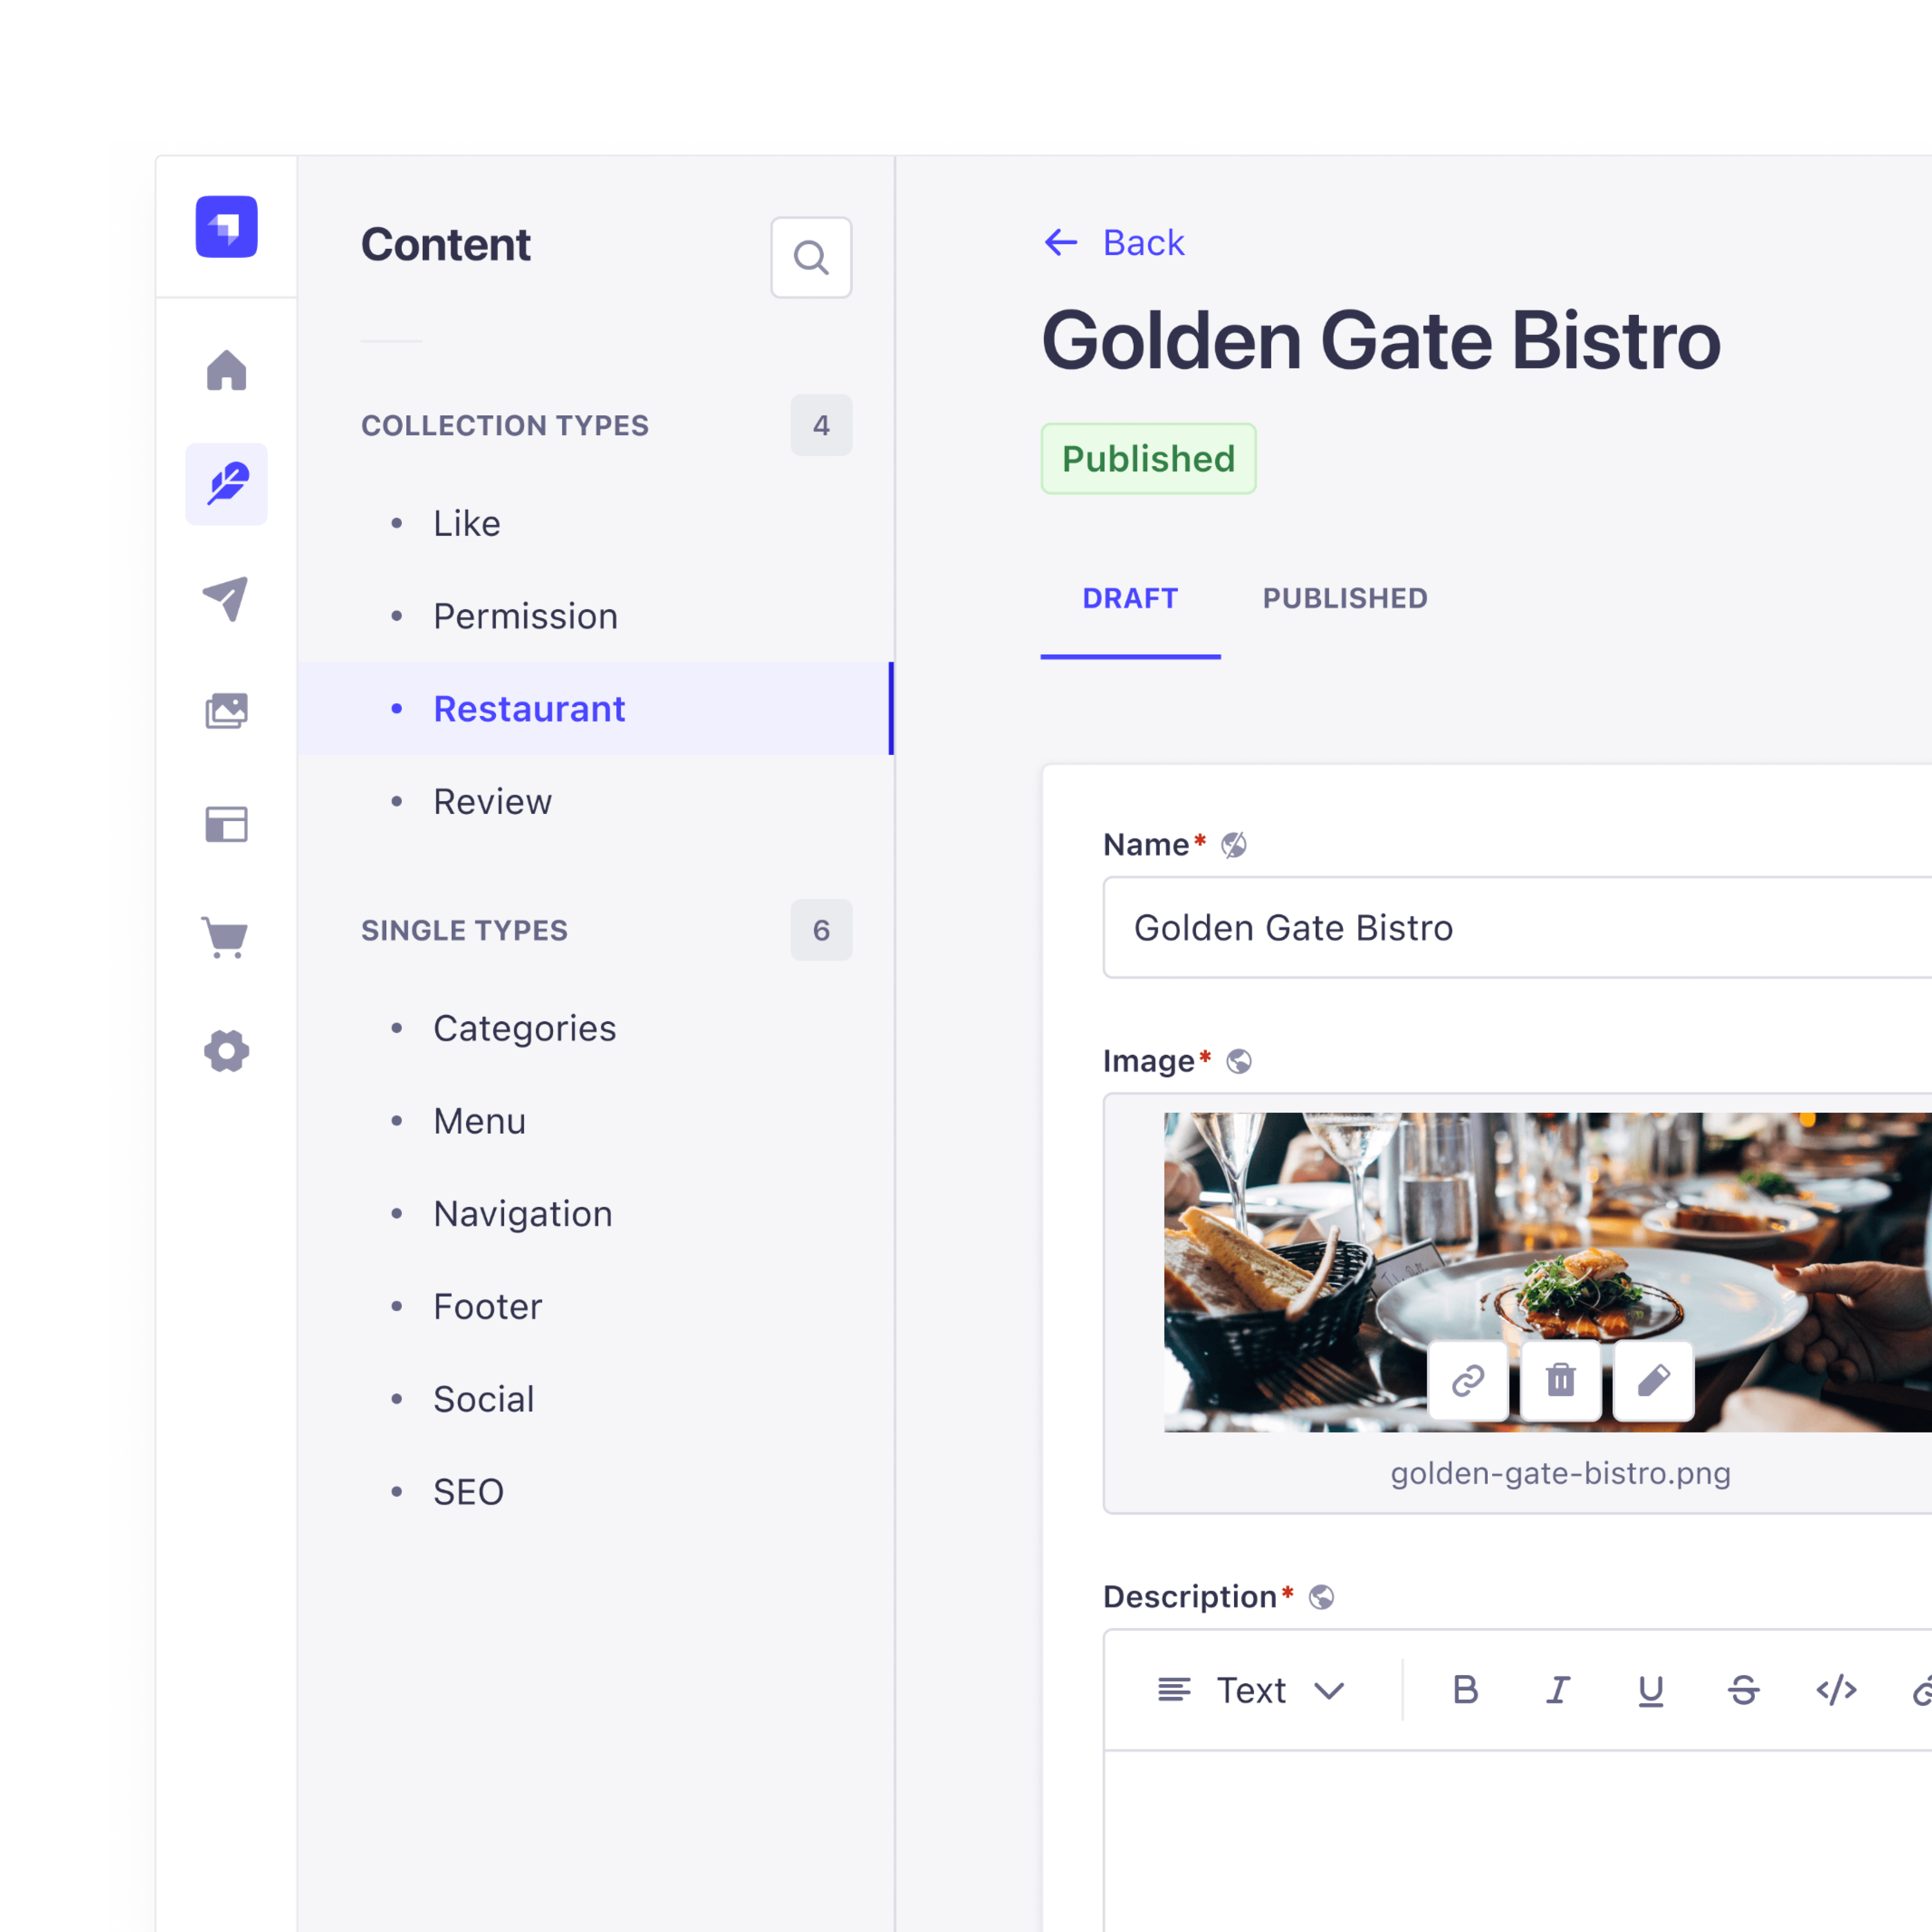
無設計稿、後端工程師的情況下,研究 PayloadCMS、Strapi 等開源可客製的框架。
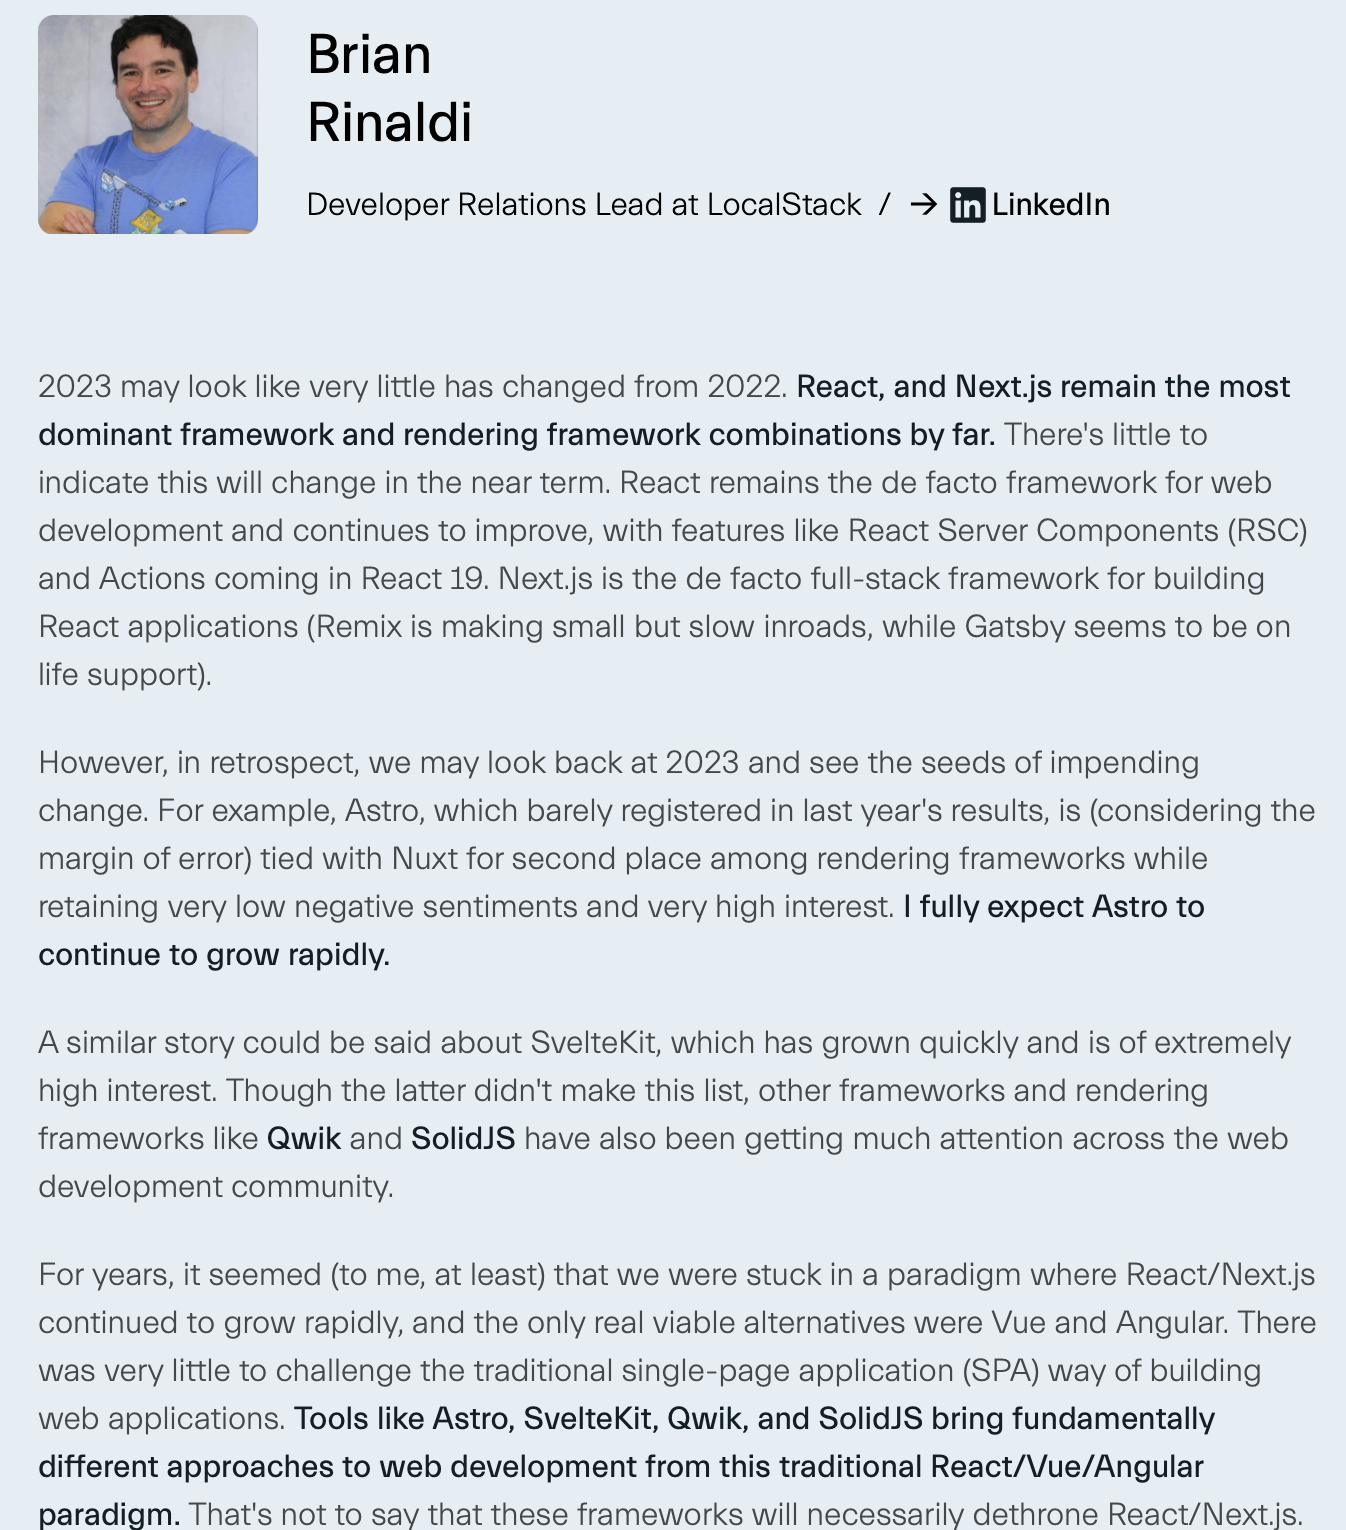
根據 State of Frontend 2024,約 20% 開發者使用 Astro 作為靜態網站框架。相較之下,Next.js 的 SSR 邏輯越來越不直覺,因此這次想嘗試 Astro 來重構部落格。
GET /api/article-list API 回傳所有文章資訊很多前端 RD 其實讀太擅長從需求文字直接想到很細節的 RWD ,因此這次藉由 Relume.io 生成初始版面。
.astro 檔案Component.astro<!-- SSR Javascript 放在這 --> --- // Your component script here! import Banner from '../components/Banner.astro'; import Avatar from '../components/Avatar.astro'; import ReactPokemonComponent from '../components/ReactPokemonComponent.jsx'; const myFavoritePokemon = [/* ... */]; const { title } = Astro.props; --- <!-- HTML comments supported! --> {/* JS comment syntax is also valid! */} <Banner /> <h1>Hello, world!</h1> <!-- Use props and other variables from the component script: --> <p>{title}</p> <!-- Delay component rendering and provide fallback loading content: --> <Avatar server:defer> <svg slot="fallback" class="generic-avatar" transition:name="avatar">...</svg> </Avatar> <!-- Include other UI framework components with a `client:` directive to hydrate: --> <ReactPokemonComponent client:visible /> <!-- Mix HTML with JavaScript expressions, similar to JSX: --> <ul> {myFavoritePokemon.map((data) => <li>{data.name}</li>)} </ul> <!-- Use a template directive to build class names from multiple strings or even objects! --> <p class:list={["add", "dynamic", { classNames: true }]} />
接著需解決路由與 Markdown 靜態轉換問題:
getCollection()、Layout、File System 特性"專案結構"src |- content (文章管理) |- blog |- 2025-08-01-astro-blog-update-log.md |- 2025-07-31-astro-blog-update-log.md |- config.ts (文章類型管理) |- layouts (共用 layout) |- Layout.astro |- pages (路由) |- blog |- [slug].astro |- index.astro |- 404.astro
config.ts、content都是 Astro 預設的保留字,可以用來定義文章類型,並設定 Schema。
config.ts// @/content/config.ts import { z, defineCollection } from "astro:content"; const blogCollection = defineCollection({ type: "content", schema: z.object({ title: z.string(), tags: z.array(z.string()), description: z.string(), date: z.string(), }), }); export const collections = { blog: blogCollection, };
Layout.astro--- const { seo = {} } = Astro.props; // Astro 可以從 markdown 檔案或是客製化 props 取得 SEO 參數 // 然後需要客製化 props 參數處理 --- <html lang="zh-TW"> <head> <meta charset="UTF-8" /> <meta name="viewport" content="width=device-width, initial-scale=1.0" /> <title>{seo.title}</title> <meta name="description" content={seo.description} /> <meta property="og:image" content={seo.image} /> </head> <body> <main> <slot /> <!-- slot 是保留字,文章內容及 Child Component 會放在這--> </main> <footer/> </body> </html>
getStaticPaths() 就像是 NextJS 的 getStaticProps(),取得所有文章路徑。getCollection() 取得 Markdown 資料。[slug].astro// @/pages/blog/[slug].astro --- export function getStaticPaths() { return [ { params: { id: '1' }, props: { author: 'Blu' } }, { params: { id: '2' }, props: { author: 'Erika' } }, { params: { id: '3' }, props: { author: 'Matthew' } } ]; } const { id } = Astro.params; const { author } = Astro.props; --- <BlogPostLayout frontmatter={frontmatter} headings={headings}> <Content /> <!-- 文章內容會放在這--> </BlogPostLayout>
<Link/>、<Image/> 等元件:
<a/> 並視需求客製化屬性,如 href、target、rel 等,以及 hydrate 的屬性 client:visible。"連結範例"<a href="/blog/astro-blog-update-log" class="text-blue-500"> <h1>Astro Blog Update Log</h1> </a>
當初始版型完成後,下一步為實作搜尋與 SEO:
og:image 等於 Layout 層。SeoLayout.astro--- const { seo = {} } = Astro.props; // Astro 可以從 markdown 檔案或是客製化 props 取得 SEO 參數 // 然後需要客製化 props 參數處理 --- <html lang="zh-TW"> <head> <meta charset="UTF-8" /> <meta name="viewport" content="width=device-width, initial-scale=1.0" /> <title>{seo.title}</title> <meta name="description" content={seo.description} /> <meta property="og:image" content={seo.image} /> </head> <main> <slot /> <!-- 文章內容及 Child Component 會放在這--> </main> <footer> </body> </html>
@/pages/api/search.json.tsimport { getCollection } from "astro:content"; import type { UnifiedArticle } from "@/data/mockArticles"; async function getAllArticles(): Promise<UnifiedArticle[]> { const [blogPosts, notes, travelPosts] = await Promise.all([ getCollection("blog"), ]); return [ ...blogPosts.map((post) => ({ id: post.id, data: { title: post.data.title, tags: post.data.tags, description: post.data.description, date: post.data.date, }, body: post.body, slug: post.slug, collection: "blog" as const, filePath: post.id, })), ]; } export async function GET(request: Request) { try { const articles = await getAllArticles(); return new Response(JSON.stringify(articles), { headers: { "Content-Type": "application/json", }, }); } catch (error) { console.error("Failed to fetch articles:", error); return new Response(JSON.stringify({ error: "Failed to fetch articles" }), { status: 500, headers: { "Content-Type": "application/json", }, }); } }
Requestfetch("http://localhost:4321/api/search.json") .then((response) => response.json()) .then((data) => { console.log(data); });
回傳範例:
Response[ { "id": "2025-01-20-first-blog-post.md", "data": { "title": "CMS 採坑紀錄", "tags": ["docusaurus"] }, "body": "## 動機\n\n最近因為要幫公司的網站換新版,所以就開始研究了一下目前比較流行的 CMS 系統,並且找到了一些比較有名的 Headless CMS 系統...", "slug": "headless-cms", "collection": "blog", "filePath": "2025-01-20-first-blog-post.md" } ]
SearchConfig.jsx// GET /api/article-list -> 監聽 input 事件 -> 透過 fuse 過濾搜尋結果 import { useMemo } from "preact/hooks"; import Fuse from "fuse.js"; const fuseOptions = useMemo( () => ({ // 基本選項 isCaseSensitive: false, includeScore: true, includeMatches: true, minMatchCharLength: 2, shouldSort: true, findAllMatches: false, // 模糊匹配選項 threshold: 0.4, location: 0, distance: 100, ignoreLocation: true, // 搜尋的欄位 keys: [ { name: "data.title", weight: 0.4, }, { name: "data.tags", weight: 0.2, }, { name: "data.description", weight: 0.2, }, { name: "body", weight: 0.1, }, { name: "data.area", // travel 專用 weight: 0.05, }, { name: "data.difficulty", // travel 專用 weight: 0.05, }, ], }), [] ); const fuse = useMemo(() => new Fuse(data, fuseOptions), [data, fuseOptions]);
Astro 預設大多數內容為靜態 HTML,僅在必要時使用
client:load或自訂的客戶端渲染。儘管 HMR 不代表 lighthouse 分數,但可以明顯感覺到不同 hydrate 的體驗,例如之前有碰過 Next.js 的 SSR Component,儘管元件不複雜,但卻要等上 10 秒才能看到結果。
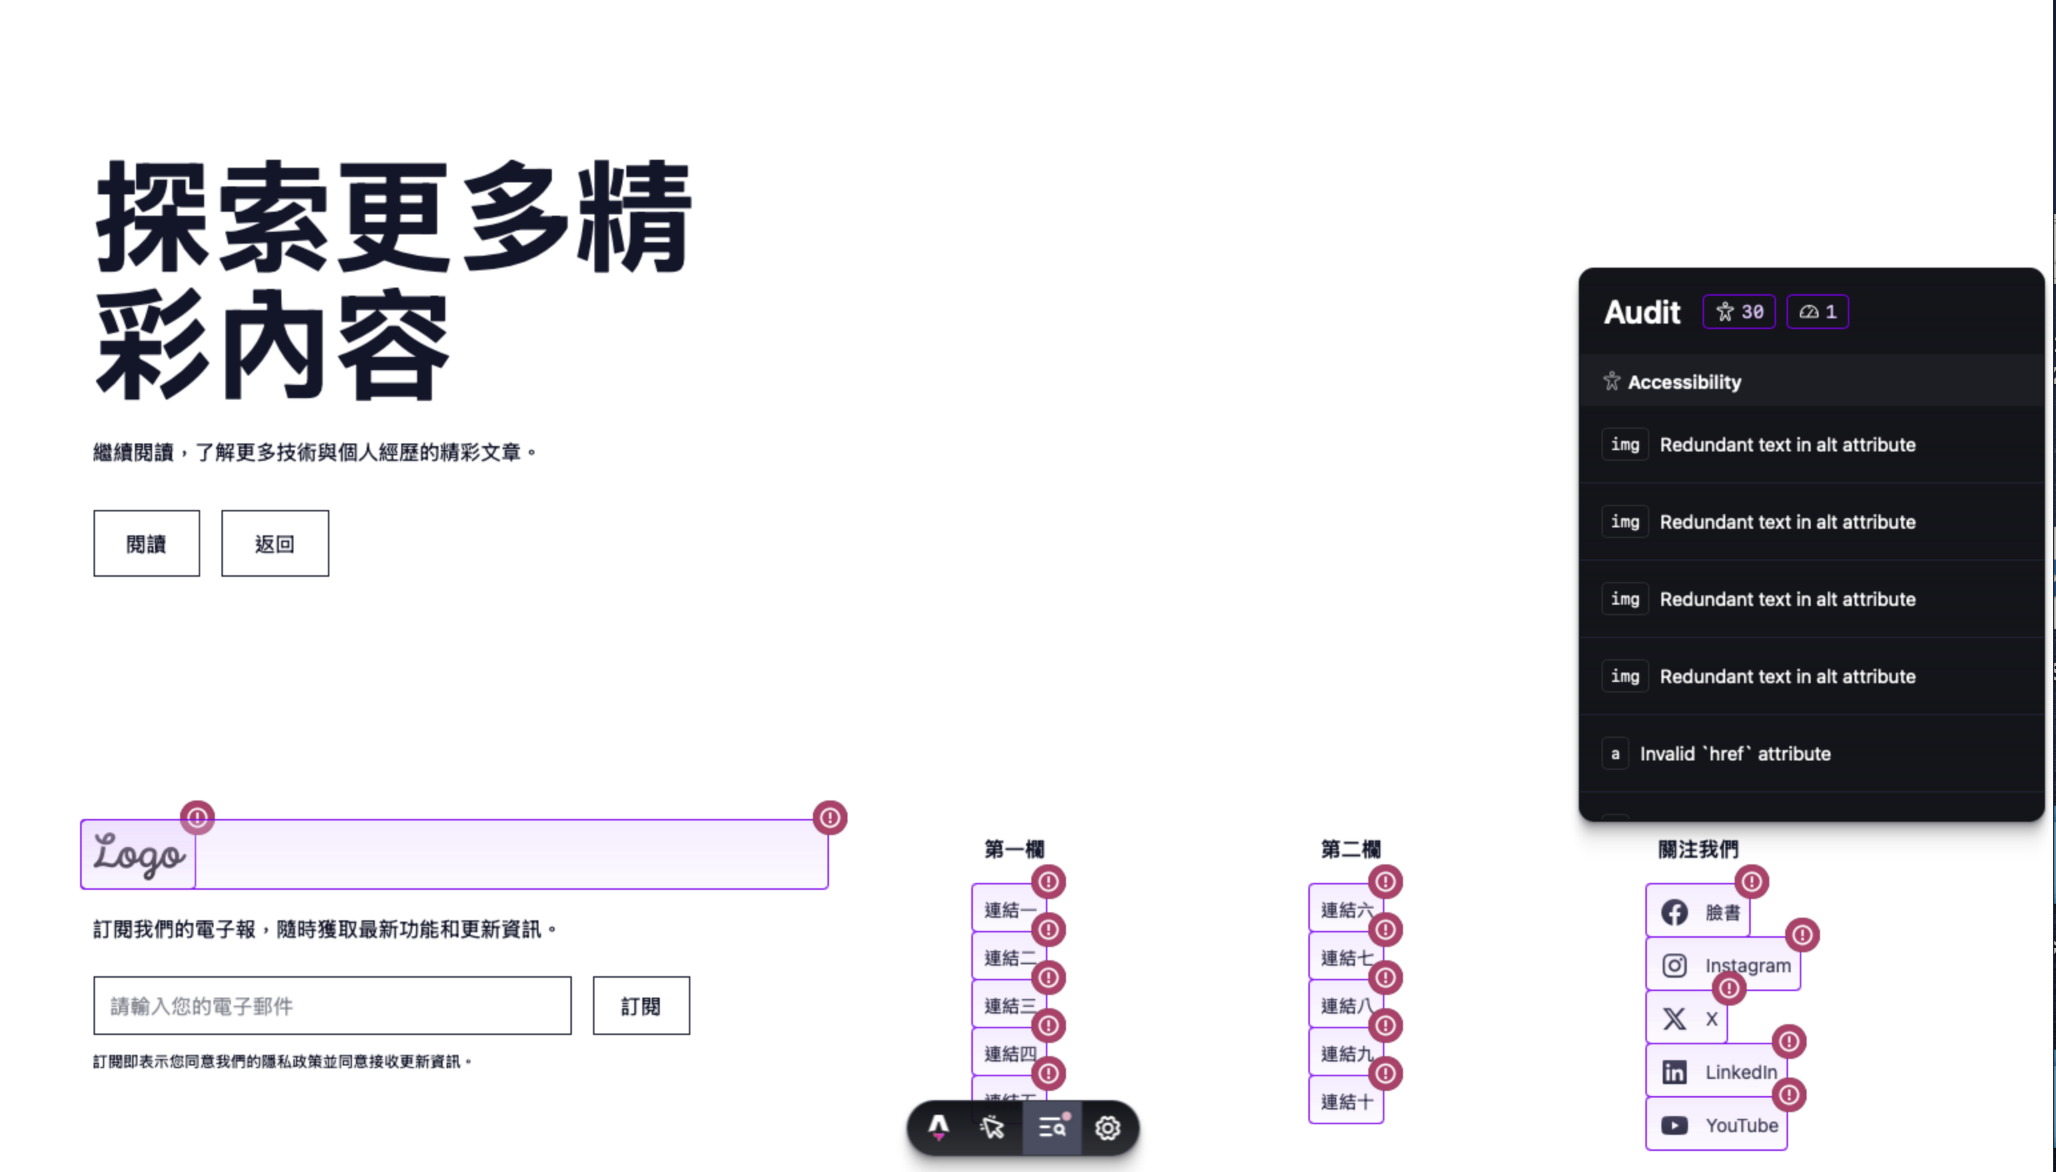
Shellastro  v5.10.1 ready in 1034 ms

┃ Local    http://localhost:4321/
┃ Network  use --host to expose


12:49:14 watching for file changes...
12:49:17 [200] / 121ms
12:49:18 [200] /api/search.json 3ms
12:49:19 [200] /blog 9ms
12:49:19 [200] /api/search.json 2ms
12:49:21 [200] /blog/astro-blog-update-log 6ms
12:49:21 [404] /img/notes/astro-accessibility-feedback.png 4ms
曾在面試時聊到:「雖然熟悉 Next.js,但許多功能(如圖片處理、路由、錯誤頁)都是框架幫你做好,真正挑戰是思考若沒有框架,該如何實作。我們真的需要這麼多框架嗎?」
NextJS 的本質:在 Server 端呼叫 React.createElement 並渲染到 Client 端。
Astro
Search.jsximport { useState } from "preact/hooks"; const [search, setSearch] = useState(""); const results = fuse.search(search); return ( <div> <input type="text" value={search} onChange={(e) => setSearch(e.target.value)} /> </div> );
這次的開發,也是一個『做中學』的過程,先從問題出發,慢慢地才知道原來有某些 Astro 文件。
整理來說,Astro 提供輕量、可擴充的架構,對於偏好靜態內容與漸進式加載的需求來說,如果未來有小型專案,仍然會考慮使用。
同時很多程式碼會看到 NextJS 及 React 的影子,過去的開發經驗可以無痛遷移。
這次開發的過程,也讓我對於 Astro 的文件有更深的了解,例如:Astro 的 File System 特性、Astro 的 Layout 特性